
2.12.1 Compass calibration
PDF p. 37The compass (magnetometer) has been calibrated when the aircraft leaves the factory, and users usually do not need to calibrate it. PDF p. 37
If the flight application displays a warning alert “Compass needs calibration, please calibrate before flight.”, please follow the steps below to calibrate it. PDF p. 37
Important
PDF p. 37The compass is very sensitive to electromagnetic interference, which can cause compass errors and a decrease in flight quality. PDF p. 37
Please choose an open outdoor area for calibration. PDF p. 37
Please stay away from strong magnetic field areas or large pieces of metal during calibration, such as magnetic ore, parking lots, construction areas with underground steel bars, near underground or overhead power transmission lines, etc. PDF p. 37
Please do not carry ferromagnetic materials or metal objects with you during calibration, such as mobile phones, watches, etc. PDF p. 37
During the calibration process, please stay away from charged objects and keep the aircraft 1.5 meters above the ground. PDF p. 37
During the calibration process, please do not turn off the power of the aircraft or start the motor. PDF p. 37
| Step | Operation | Diagram |
| 1 | After turning on the aircraft and RC, tap "☐">" ☐" > "☒" > "Compass Calibration" > "Start calibrating" on the main interface of flight application.Follow interface instruction for calibration. | < Compass Calibration[IMAGE]Please stay away from metal or charged objects, and keep the aircraft 1.5m away the groundDo not power off the aircraft or start the motors.Start calibrating |
View the original table / diagram
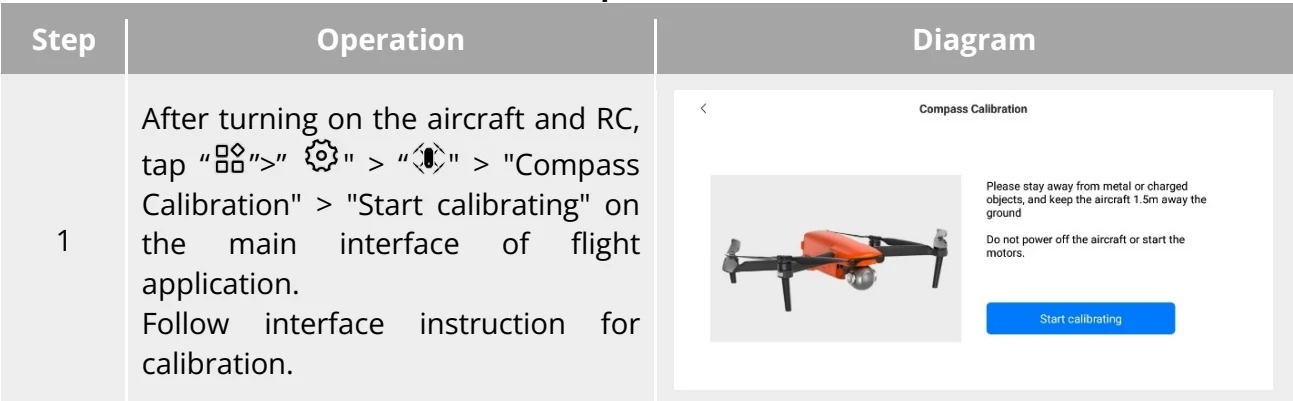
Hold onto the aircraft to keep it in a horizontal position. PDF p. 38
2 Rotate horizontally 360 ° until the interface prompts next step. PDF p. 38
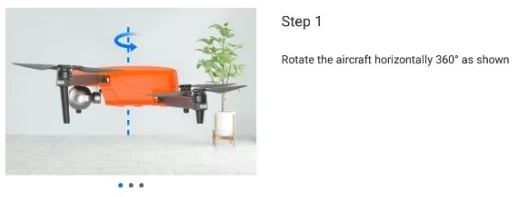
| 3 | Hold onto the aircraft to keep it in a vertical position with the nose pointing upward.Rotate horizontally 360° until the interface prompts next step. | < Compass Calibration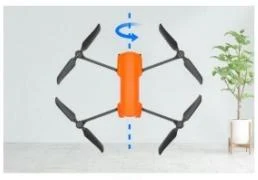 Step 2Rotate the aircraft vertically 360° as shown... Step 2Rotate the aircraft vertically 360° as shown... |
| 4 | Hold onto the aircraft, positioning the nose to the left and the side facing downward.Rotate horizontally 360° until the interface prompts calibration successful. | < Compass CalibrationStep 3Side rotate the aircraft 360° as shown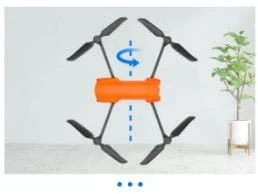 |
View the original table / diagram
2.12.2 IMU calibration
PDF p. 38The IMU (Inertial Measurement Unit) of the aircraft has been calibrated at the factory, and no user calibration is required under normal conditions. PDF p. 38
If the flight application displays warning alerts such as "Cannot take off due to IMU error. Calibrate IMU first." or "Please calibrate IMU", please follow the steps below to calibrate it. PDF p. 38
Important
PDF p. 38Follow the prompts on the IMU calibration page in the flight application to position the aircraft and ensure it remains in a stationary state. PDF p. 38
Place the aircraft on a flat surface and refrain from moving, turning off, or restarting the aircraft during the calibration process. PDF p. 39
The gimbal will be inactive during the IMU calibration process. PDF p. 39
| Step | Operation | Diagram |
| 1 | After turning on the aircraft and RC, tap "☐">" ☐" > " ☐" > "IMU Calibration" > "Auto Calibration" on the flight interface of flight application.Follow the instructions in the interface to calibrate the IMU. | < IMU Calibration * Please place the aircraft on a level surface* Please do not move, power off, or reboot the aircraft during calibrationAUTO CALIBRATION * Please place the aircraft on a level surface* Please do not move, power off, or reboot the aircraft during calibrationAUTO CALIBRATION |
| 2 | Fold the arms of the aircraft and place it horizontally on the ground until the interface prompts next step. | < IMU Calibration1/6 Step oneFold the arms in and lay the aircraft on a leveled surfaceCalibrating.. Please wait Step oneFold the arms in and lay the aircraft on a leveled surfaceCalibrating.. Please wait |
| 3 | Flip the aircraft 180°, placing it with the belly facing up on a flat surface, until the interface prompts next step.Please be careful to protect the lens on the back of the aircraft during this process. | < IMU Calibration2/6 Step twoTurn the aircraft 180°, gimble side upCalibrating.. Please wait Step twoTurn the aircraft 180°, gimble side upCalibrating.. Please wait |
| 4 | Place the left side of the aircraft flat on the ground until the interface prompts next step. | < IMU Calibration3/6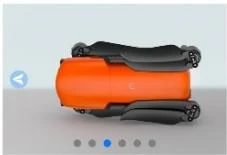 Step threePlace the aircraft flat on the ground, leftside downCalibrating.. Please wait Step threePlace the aircraft flat on the ground, leftside downCalibrating.. Please wait |
| 5 | Place the right side of the aircraft flat on the ground until the interface prompts the next step. | < IMU Calibration4/6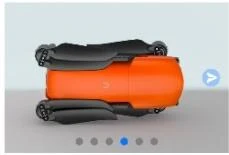 Step fourPlace the aircraft flat on the ground, rightside downCalibrating.. Please wait Step fourPlace the aircraft flat on the ground, rightside downCalibrating.. Please wait |
View the original table / diagram
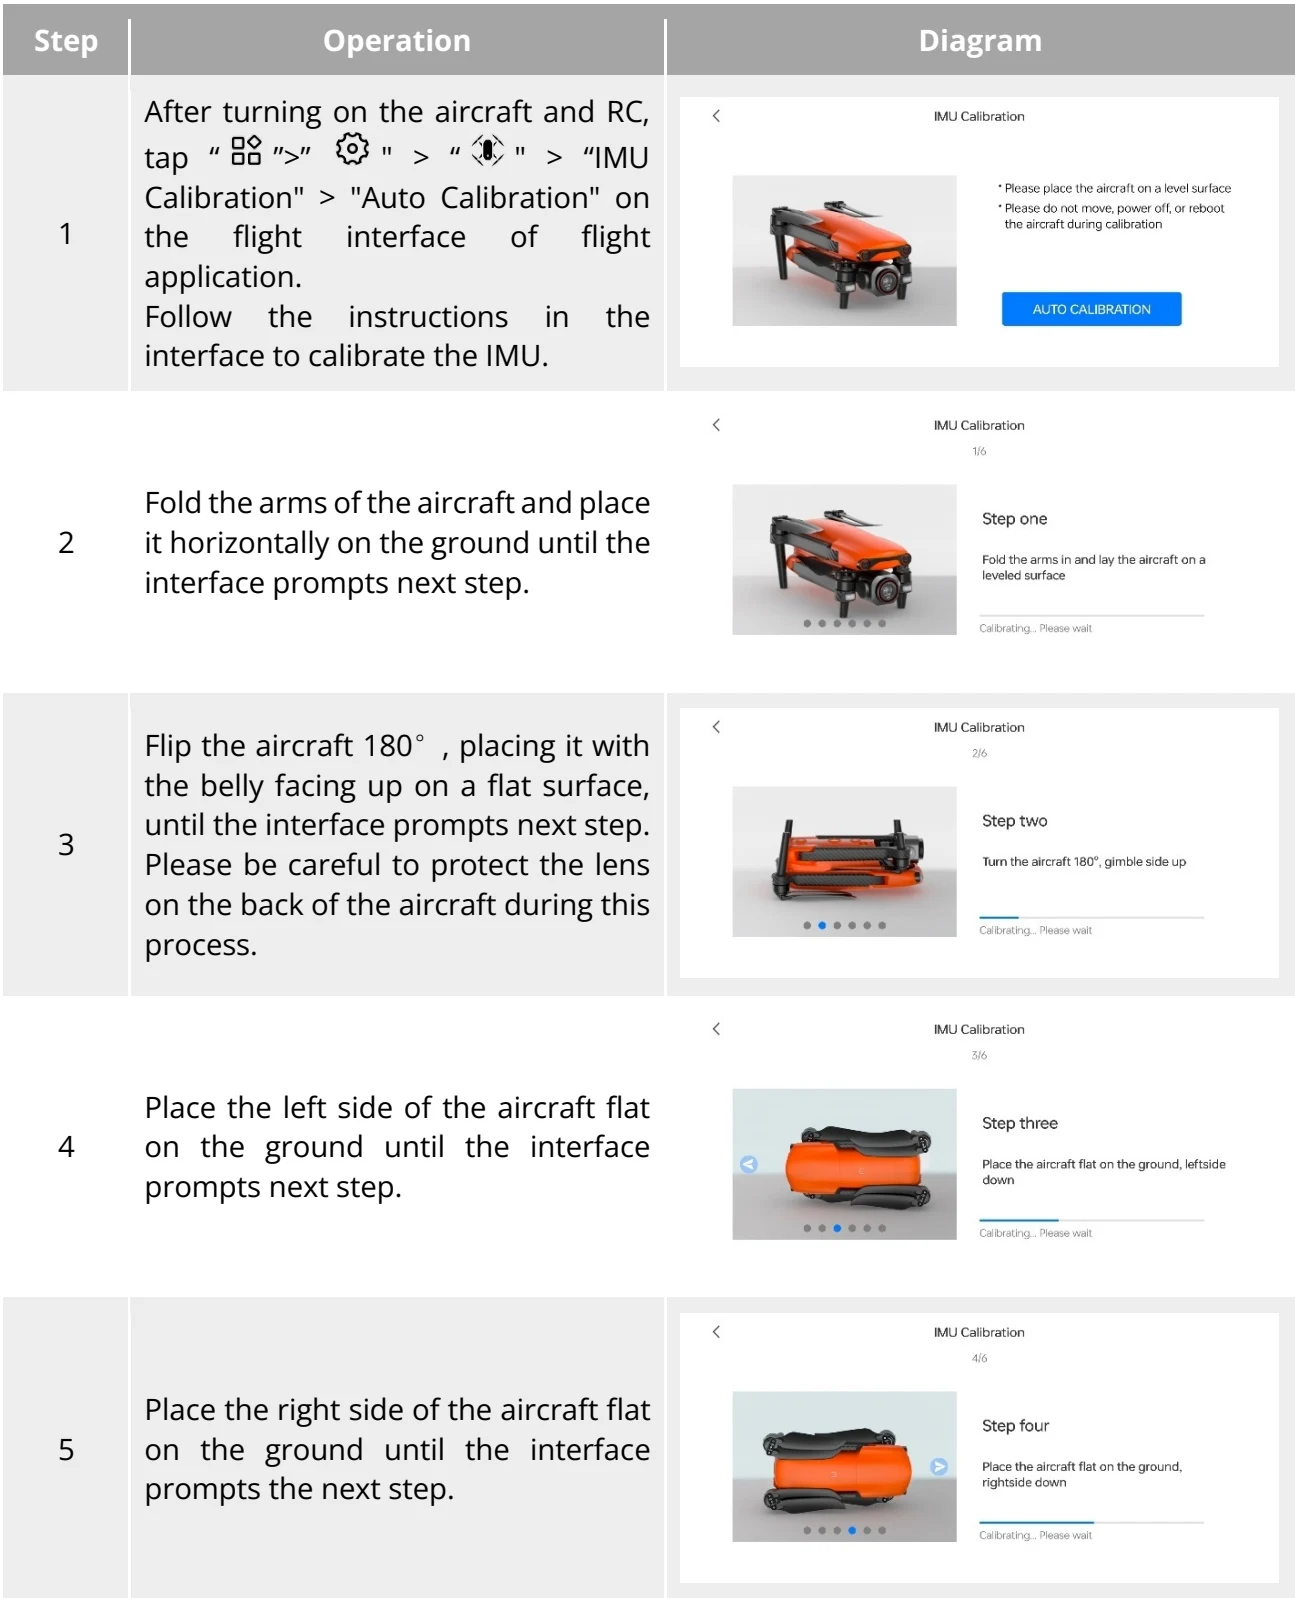
Fold the arms of the aircraft and place it with the nose facing upward on the ground until the App prompts that PDF p. 40
6 the calibration is successful. Please be careful to protect the lens on the rear of the aircraft during this process. PDF p. 40
Please perform the calibration steps according to the tips shown in the IMU calibration interface of the flight application. PDF p. 40
If the calibration fails, repeat the above steps. PDF p. 40
After the IMU calibration is completed, please re-boot the aircraft. PDF p. 40
2.12.3 Gimbal auto calibration
PDF p. 40The gimbal is calibrated during the manufacturing of the aircraft and typically does not require user-initiated auto-calibration. PDF p. 40
If the flight application prompts “Please calibrate the gimbal motor”, please follow the steps below to calibrate the gimbal. PDF p. 40
| Step | Operation | Giagram |
| 1 | Place the aircraft on a flat surface, and after turning on both the aircraft and the RC, keep the aircraft in a stationary state.On the flight interface of the flight application, tap “☐”>-“◎”>-“◎”> "Start calibrating" in sequence. | < Gimbal Calibration[IMAGE]Please place the aircraft on flat ground and keep the aircraft stationary during calibration.Start calibrating |
View the original table / diagram
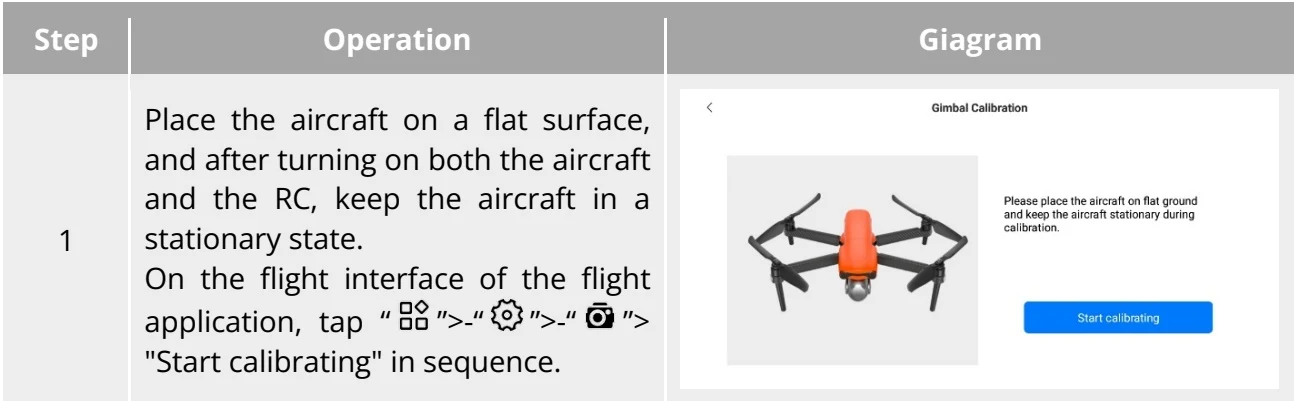
Wait, the screen prompts "Calibration 2 successful" and then the gimbal automatically calibrates successfully. PDF p. 40